COLLEGE MATH 119
HONORS PHYSICS
Lakeview
The Lakeview project was based on the first project that we did in class, called the "Static Wave". This project was about creating a wave using mathematics, including formulas and graphs. This was the start of the following project that was imitating the teacher's sample project, but in a different design. After finishing the teacher's design, it was time to create our own design and get creative. This was the most challenging part of this whole project because they were many obstacles in order to achieve our desires. After finishing the first draft of this project, we worked on the final draft and this was the easiest yet most challenging. We had to made sure that everything was in perfect condition and was long-lasting. The results were really good and got great reviews from our teachers and classmates. My group and I were extremely proud of the final results and had a great experience overall.
For my part of the final project, I worked on the drive gears and the whole mechanism of the project. At the beginning, it was difficult to come up with the design of the drive because my group and I wanted a smaller drive so it could fit better with the design. I decided that it was best to have smaller drive gears than the regular ones because the project would look more put together and it would be different than the other designs. I liked the idea of a smaller drive because it was more practical and took less amount of time to create on the CNC Machine. The cutting process on the CNC went pretty well because I had a little bit of experience from previous projects, so the process was not difficult at all. It took about 30 minutes to cut all of the pieces, including the drive gears and the whole mechanism. The big drive gear had a total of 50 teeth and had a diameter of 8 inches. The small drive gear had a total of 25 teeth and had a diameter of 4 inches. The mechanism of the project was 17 x 17 inches and the hole in the middle had a diamater of about 15 inches. All the pieces were looking good and were completed by the end of the second week, including the sanding and the 3 coats of polyurethane that were required.
The final part of the process was to attach my pieces to the top of the frame and in order to do this I had to cut out a 10 x 10 inches piece of wood to place the drive gears on. Then, I drilled a hole for the motor that we were going to use that had a 5 RPM. We wanted the wave to move a little faster but not too fast because the wave pieces were fragile and we did not wanted them to break on the process. It was time to attach the drive gears to the top of the frame and this part was stressful because the smaller drive gear needed to be attached to the motor with a thin screw, but I asked for help and that made this process a lot easier. I also needed to assure that the screws were the correct ones for them to not fall when the motor was turning. After finishing the top part, I had to attach the bigger part that was hanging to the top, so I cut 4 pieces of chain that were the exact same size for each side of the squares. I made four holes on each side of the squares (top and bottom) and I used thin wire to attach the chain with. I placed the wire on the top of the frame, so it would not be visible and I used staples to keep the wire in place. For the bottom piece I used screws and washers to have a cleaner result. All of this process was experimenting with what was given because the first draft of the project was not as hard and detailed as this one. Overall, my part was the most tedious of the project and it took a lot of patience and trying new things to have better results.
Week 1 - Michel
During week #1, we analyzed our first draft of the wave and the changes that we wanted to add to the final prototype. We decided that we wanted to make a couple of changes to have a better final result. Our group wanted to reflect our creativity in the final result, so we decided to add a chain to the hanging piece and use acrylic for the wave instead of using wood. Other small changes that we wanted to make were having a smaller frame and a slightly bigger drive to have equal proportions to the other parts of the project. After deciding the changes that we wanted to make, we started cutting all of the pieces that we needed and were done cutting almost everything by the end of the week.
We divided who was doing the different pieces of the project: Edy was in charge of the frame, while Jami worked on the wave, and Michel did the drive parts. Edy and Michel were working on cutting all of their pieces out, while Jami was working on the draft for the wave pieces. By the end of the week, two members of the group had all of their pieces cut out and sanded. The only thing that was left to cut was the wave part of the project, which needed to be cut on the Laser Cutter, and the cantilever which we needed to have the skeleton together before working on the size of this piece. Overall, we completed all of the requirements for that week and were on task with the things that we needed to do for that week.
Week 2 - Jami
During week #2, Edy started pollying the frame, the drive parts, and the gears. She got two coats of polly done on Tuesday and then finished the final coat on Wednesday. On tuesday I also started narrowing down a design for the wave since we had come up with about five different possible designs for the wave pieces. We ended up settling with the intersecting pieces design because we think that the green and the blue acrylic would look good together. That same day I cut a draft of the wave pieces on the laser cutter using cardboard to get a sense of what the intersecting design would look like. I made different corrections when the two pieces would not fit together like making the slit they had smaller and adding a hole to one piece so that the string could go through it.
I then cut out a second draft of the wave using now the acrylic we were going to use for the final instead of the cardboard. I only cut out two pieces to see if the chances I previously made were more accurate. When I cut them out they were still a bit off but I decided that if I put a little super glue on them they would be good to go. Once I was happy with the way the draft ones looked I then cut out the amount of pieces we needed in the blue and green acrylic. That same day I also had time to glue all the wave pieces together. Michel also made cuts and the three of us put together the box we are thinking of adding to our project. A coat if poly was applied to the box by Michel.
Week 3 - Edy
During week #3, we were adding the Polyurethane to all parts of the project. Michel and Jami added Polyurethane to the drive and Edy finished the layers of Polyurethane on everything else like the frame and the gears, all of them with 3 coats of Polyurethane. We then all attached everything together meaning the drive and the motor we had wired and had attached to the frame using wood glue, nail guns etc. Edy and Michel than worked on measuring the dimensions for the cantilever making sure that the cantilever have ¾ the size of the part of the frame that was holding everything which was challenging because we didn't have much room because of the motor and drive and everything else that was attached to the top and the bottom of our frame.
We also had to redo the cantilever a few times because the first two did not fit onto the frame or was cut at the wrong angle. Edy, Jami, Michel then attached the strings using clear plastic string and attaching it to our pieces of the wave and then onto our project which was challenging because our wave pieces were very fragile and kept falling and breaking. As they were made out of very thin fragile plastic pieces that were not very strongly connected and only put together by super-glue. We then had to use the Laser Cutter to make more pieces but some we were able to just glue back together with super glue. This week had its ups and downs, but at the end we got a lot of things done regardless of the challenges that we faced.
Week 4 - Michel
During the last week, my group and I started putting all of the pieces together. We started attaching the driven gears to the frame and did a hole on the top of the frame to fit in the motor. The drive parts were attached next and we super-glued all of the screws to the nuts in order for them to not fall apart. After having the frame with the hanging driven gears, it was time to attach the other part of the drive, the bottom part was going to be hanging from the top of the frame with chains. Michel cut out the chains and attached them to the top and bottom of the drive. The last thing that needed to be done to the final project was the wave. For this part Jami was attaching the string of each wave to the top of the drive and accommodating them to their corresponding place.
While testing our final project on the test wall, the screw of the main drive was falling apart and we added more super-glue in order for the pieces to stay in place and not move while it was spinning. After adding super-glue, it worked and the cycles turned out to be fine. After we completed the 20 minute cycle, we were finally done and ready to place our project on the wall upstairs. Fortunately, everything this week turned out well and nothing really bad happened. There were some things here and there, but the final result was worth the effort and all the work that we all did. Our group is very content with the end results because we worked hard to finish on time and have a successful final project.
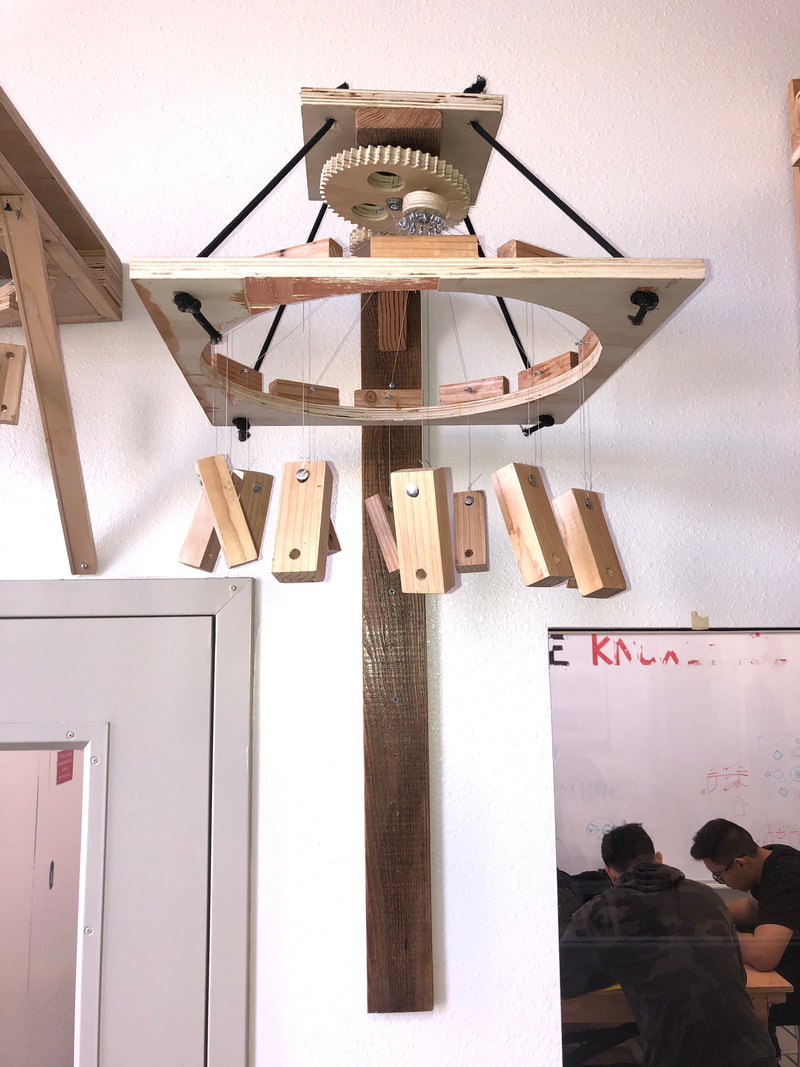
First draft front view.
|
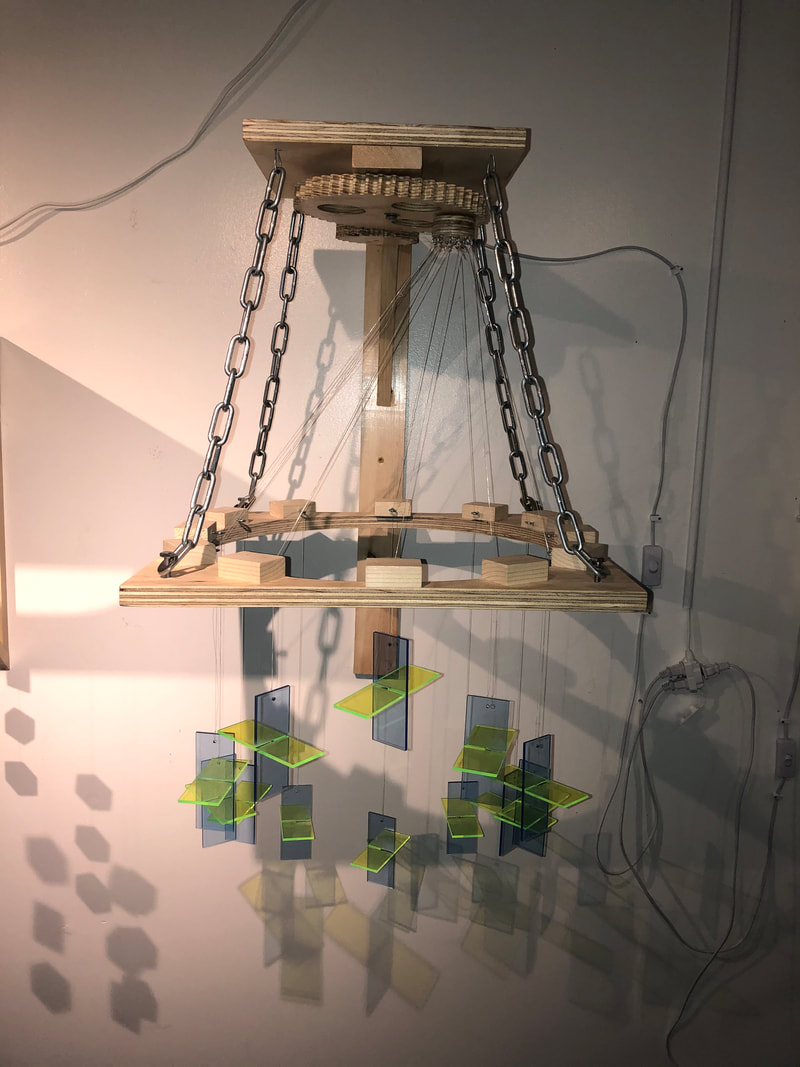
Final draft front view.
|
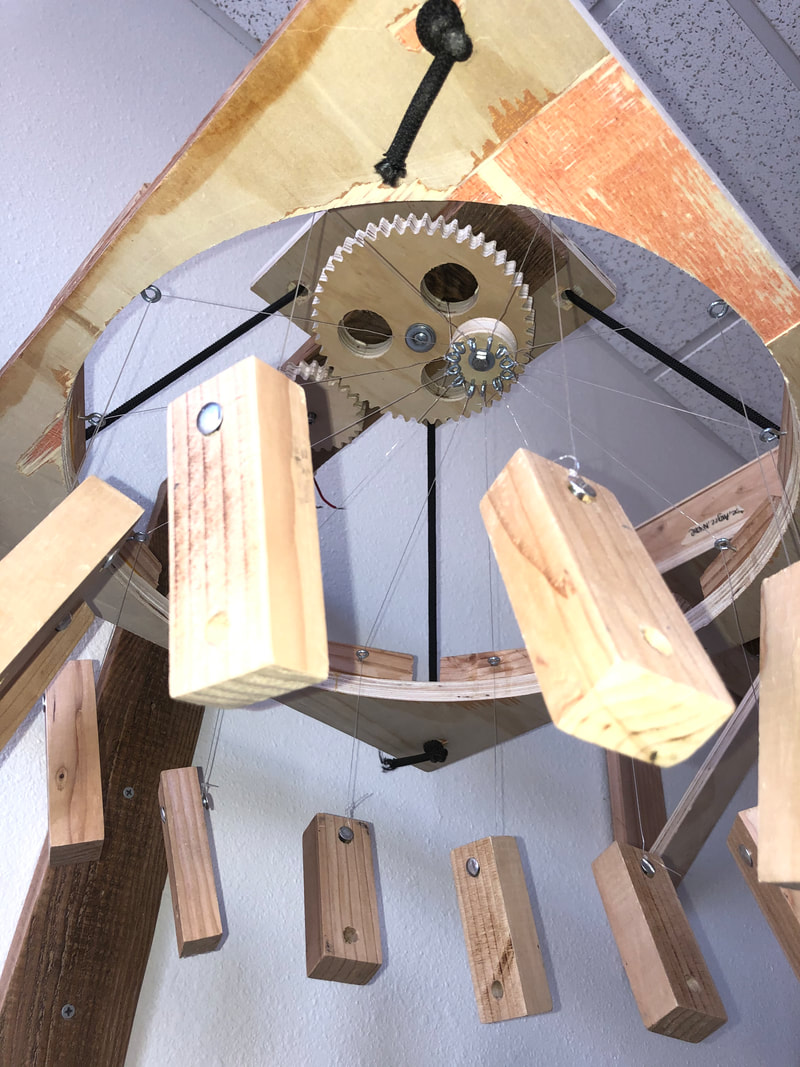
First draft close view.
|
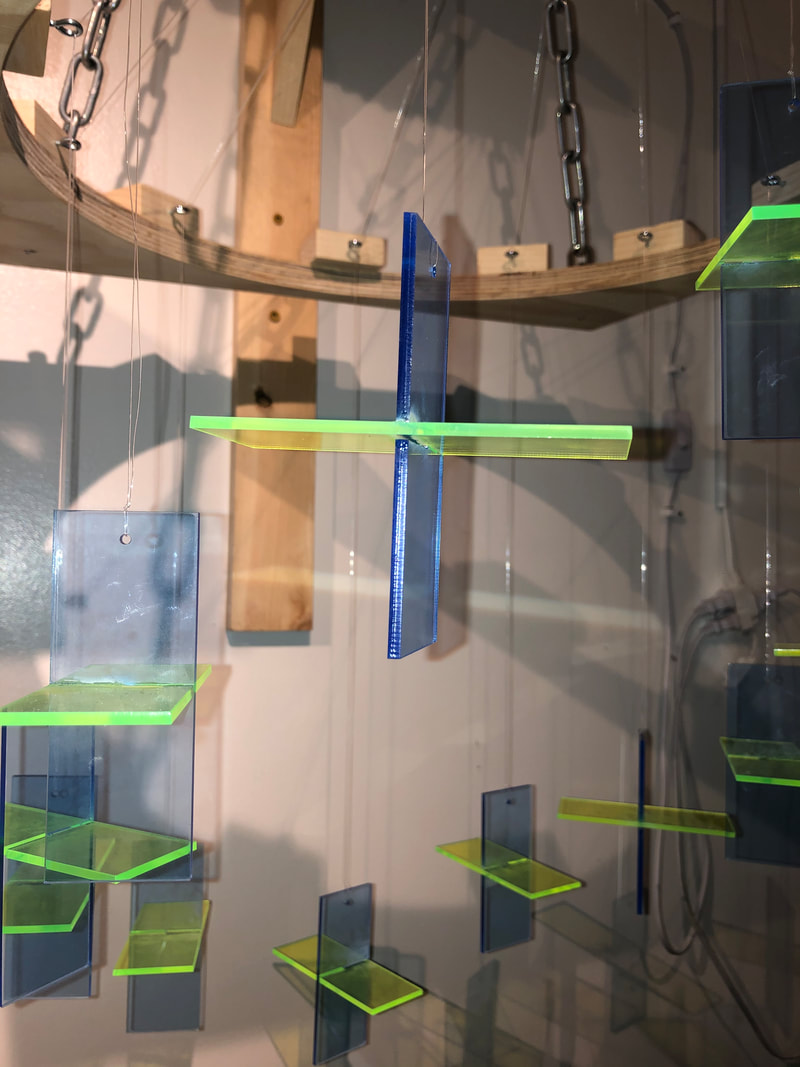
Final draft close view.
|
MATH
MULTIMEDIA
